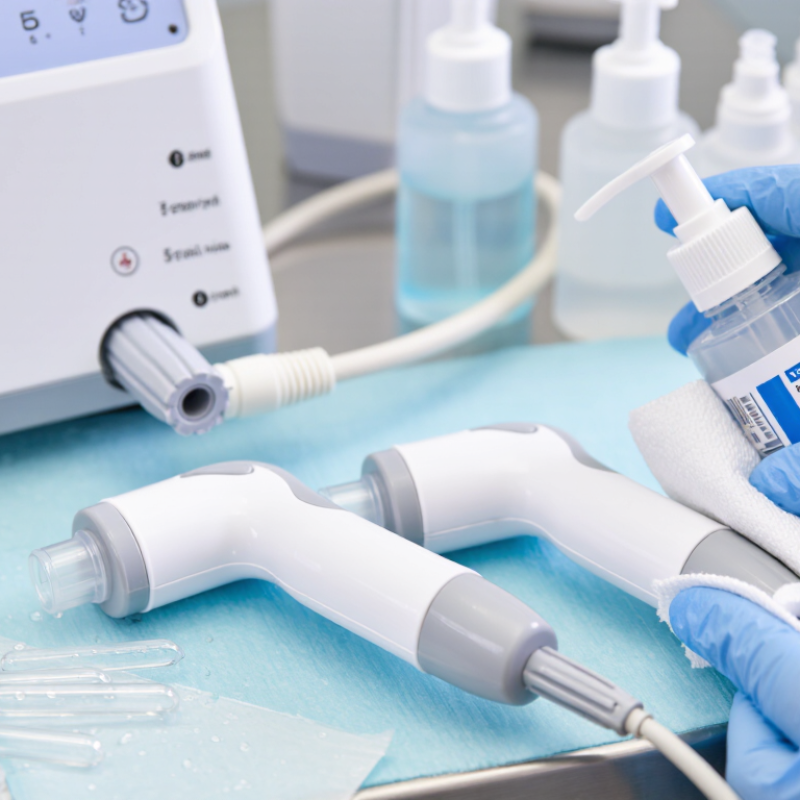
China Top 10 How to Sanitize HydraFacial Handles?

Time:2026-10-21 Author:Isabella
0%

HydraFacial treatments use water, suction, serums, and repeated contact with facial skin. That combination makes handle hygiene a practical infection-control issue, not merely a cosmetic detail. The CDC’s Guideline for Disinfection and Sterilization in Healthcare Facilities identifies cleaning as an essential step before disinfection. FDA reprocessing guidance also stresses that reusable equipment requires clear, validated instructions.

For clinics searching “how to sanitize hydra facial handles between clients,” the process should begin immediately after each treatment. Remove visible residue from the tip, tubing connection, and grip. Use the manufacturer-approved detergent and disinfectant. Respect the product’s contact time. A quick spray and wipe may look efficient, but it may not achieve effective disinfection. Small crevices deserve attention. So does the area around the water outlet.

William A. Rutala, PhD, MPH, a recognized infection-prevention specialist, has stated, “Cleaning is the necessary first step of any disinfection or sterilization process.” His warning is easy to overlook during busy appointment schedules. A clean-looking handle is not automatically a safe handle. This guide will compare practical sanitation methods, manufacturer instructions, documentation habits, and common mistakes. It will also explain when a disposable component should be replaced rather than reused. Exact procedures may vary by HydraFacial model, local requirements, and product labeling. That uncertainty matters. No universal shortcut should override the device’s official instructions or a qualified infection-control professional’s judgment.

China Top 10 How to Sanitize HydraFacial Handles?

Understanding HydraFacial Handle Hygiene and Sanitation Requirements

HydraFacial Handle Hygiene and Sanitation Requirements

A HydraFacial handle touches skin, fluids, and treatment residue during every session. That contact makes cleaning a safety step, not a cosmetic detail. The CDC reports that about 1 in 31 hospital patients has a healthcare-associated infection on any given day. Although aesthetic clinics differ from hospitals, the risk principle remains relevant. Reusable handles need documented processing after every client.

Start by removing visible serum, oil, and tissue with a compatible detergent. Do not rely on disinfectant alone. Organic residue can reduce disinfectant performance. The CDC’s Spaulding framework classifies equipment by contact risk. A handle touching intact skin generally requires thorough cleaning and low-level disinfection. Contact with broken skin or blood may require a higher level of processing, according to the device instructions and local requirements. Never immerse electrical components unless the manufacturer permits it.

Use fresh gloves, clean wipes, and the correct contact time listed on the disinfectant label. A rushed wipe is not a validated process. Keep the handle visibly wet for the full exposure period. Then allow complete drying before storage. AAMI ST79 emphasizes written procedures, staff training, and monitoring for reusable medical equipment. Clinics should record the operator, date, product, and processing result. Small gaps matter. In practice, staff may clean the tip carefully but overlook seams, tubing connectors, or the trigger area. That overlooked edge can hold residue. Periodic audits, photographed checklists, and refresher training help expose those weak points. Some procedures still need improvement. That is normal, but ignoring the gap is not.

China Top 10: How to Sanitize HydraFacial Handles?

Understanding HydraFacial Handle Hygiene and Sanitation Requirements

Each control shown is expected for every reusable-handle reprocessing cycle. A value of 100% means the control should be completed every time before the handle is used again.

Clean visible soil before disinfection, use an appropriate registered disinfectant, follow the product label contact time, perform hand hygiene, and follow the device manufacturer’s instructions and local infection-control requirements. Disinfectant contact time varies by product and should not be assumed.

Preparing the Handle and Disinfection Supplies Safely

China Top 10 How to Sanitize HydraFacial Handles?

Preparing the Handle and Disinfection Supplies Safely

Prepare the handle before touching any disinfectant. Wash your hands, then wear disposable gloves and eye protection. Disconnect the device according to its operating instructions. Remove detachable tips, tubes, and visible residue. Do not immerse the handle unless the manufacturer specifically permits it. Moisture can enter seams, buttons, or electrical connections.

Use a clean tray, lint-free wipes, a waste container, and a timer. Check the disinfectant label carefully. The U.S. Centers for Disease Control and Prevention states that cleaning must occur before disinfection because organic material can reduce disinfectant effectiveness. Its infection-control guidance also stresses the full labeled contact time. Keep the surface visibly wet for that period. A quick wipe is not enough. Keep it simple.

Apply the solution to the wipe when required, rather than spraying near openings. Wipe from cleaner areas toward dirtier areas, changing wipes when visibly soiled. Avoid mixing chemicals. Allow the handle to dry completely before reconnecting it. The Association for the Advancement of Medical Instrumentation recommends following validated processing instructions and checking material compatibility. That matters for coatings and seals.

One honest limitation remains: not every handle has the same construction. Contact the equipment supplier when instructions are unclear. In practice, rushed staff may shorten contact time or reuse a drying cloth. That small shortcut deserves review. Document the product, concentration, start time, and operator. A simple record can reveal repeated gaps and support safer infection-control training.

Cleaning the HydraFacial Handle Before Disinfection

Cleaning the HydraFacial Handle Before Disinfection

Before disinfection, remove visible residue from the handle and attached parts. Use a fresh, lint-free cloth dampened with an approved cleaning solution. Do not spray liquid directly into openings, buttons, or connection points. Wipe the grip, edges, and treatment head carefully. Dried serum can collect around seams and may protect microorganisms from the disinfectant.

Use a soft brush for narrow grooves, then remove loosened debris with a clean cloth. Follow the equipment instructions for compatible solutions, contact time, and moisture limits. In practice, a rushed wipe can look complete while leaving residue near the nozzle. This step needs patience. Inspect the handle under bright light before moving to disinfection. If cracks, cloudy surfaces, or damaged seals appear, stop and report the issue to a qualified supervisor.

Tips: Wear suitable protective gloves. Change cloths between devices. Keep cleaning tools separate from disinfected items. Never reuse a visibly soiled cloth. Allow the handle to remain visibly clean and appropriately dry before applying the disinfectant. Record routine checks when required by your facility’s procedure. A small oversight matters. A second inspection is often worthwhile.

China Top 10 How to Sanitize HydraFacial Handles? - Cleaning the HydraFacial Handle Before Disinfection
No. Cleaning and Sanitization Step Recommended Action Key Control Point Acceptance Check
1 Prepare the Work Area Clean and disinfect the work surface, prepare disposable gloves, lint-free wipes, detergent, and an approved surface disinfectant. Keep clean supplies separate from used accessories and contaminated materials. Clean supplies are ready and the work area is uncluttered.
2 Perform Hand Hygiene Wash hands before handling the device and put on clean, single-use gloves. Change gloves if they become visibly soiled or torn. Hands and gloves are clean before the handle is handled.
3 Disconnect the Handle Turn off the equipment and disconnect the handle, tubing, and removable attachments according to the equipment instructions. Do not pull sharply on tubing or electrical connections. The handle is safely separated from the equipment.
4 Remove Visible Residue Use a disposable or lint-free wipe to remove serum, oil, skin debris, and other visible residue from the external surfaces. Visible soil should be removed before applying disinfectant because organic material can reduce disinfectant performance. No visible residue remains on the handle exterior.
5 Clean With Detergent Solution Apply a compatible neutral detergent solution to a cloth or wipe and clean the handle surface, seams, grip areas, and connection points. Do not pour liquid directly onto the handle unless the equipment instructions specifically permit it. All accessible external areas have been wiped evenly.
6 Clean Small Crevices Use a soft brush or suitable lint-free swab to clean grooves, joints, and hard-to-reach external areas. Use tools that will not scratch, puncture, or damage seals and protective surfaces. No buildup is visible in seams or crevices.
7 Remove Detergent Residue Wipe the handle with a clean cloth lightly dampened with water, when compatible with the equipment instructions, to remove detergent residue. Prevent excess moisture from entering openings, ports, connectors, or internal components. The surface is free from detergent film and excessive moisture.
8 Dry the Handle Dry all cleaned external surfaces with a clean, lint-free cloth and allow the handle to air-dry if required by the instructions. Disinfectant should be applied only to a clean surface using the method specified for the device. The handle is visibly clean and dry before disinfection.
9 Apply an Approved Disinfectant Apply a disinfectant that is compatible with the handle materials and approved for the intended healthcare or cosmetic-use application. Follow the disinfectant label for concentration, coverage, ventilation, and required wet contact time. Never mix disinfectants. The entire required external surface remains wet for the stated contact time.
10 Inspect and Store After the required contact time, allow the handle to dry as directed, inspect it for damage, and store it in a clean, dry location. Do not use a handle with cracked housing, damaged seals, exposed wiring, or fluid ingress. The handle is dry, intact, clean, and ready for the next procedure.
Important: Always follow the specific equipment instructions and the disinfectant label. External wiping and low-level disinfection do not replace sterilization when a component is classified as reusable critical or semicritical equipment. Do not immerse the handle or use high heat unless the equipment instructions explicitly allow it.

Applying the Correct Sanitization Procedure Step by Step

Sanitizing a facial treatment handle requires a controlled, repeatable process. Begin by removing the handle from power and detaching disposable tips, tubing, or solution containers. Wear gloves and eye protection. Wipe visible residue with a lint-free cloth moistened with a compatible cleaning solution. Pay attention to grooves, ports, and the area around the nozzle. Organic residue can reduce disinfectant performance.

Rinse or wipe away cleaner when required by the product instructions. Apply an approved healthcare disinfectant evenly across every external surface. Keep the surface visibly wet for the full contact time stated on its label. Do not shorten this step. It feels slow, but contact time matters.

Never soak an electrical handle or force liquid into openings. Follow the equipment manual for internal channels, removable parts, and heat-sensitive materials. If a component is labeled single-use, discard it safely rather than attempting to reprocess it. Allow all parts to air-dry completely before reassembly.

Tips: Use a fresh cloth for each handle. Check the nozzle under bright light. Record the cleaning time, disinfectant, and staff initials. Inspect for cracks, cloudiness, loose fittings, or persistent odor. Stop using damaged equipment and report it for professional assessment. A common mistake is cleaning only the visible front surface. The underside and connection points need equal attention. Procedures should be reviewed against current manufacturer instructions and local clinical requirements, because materials and approved disinfectants can change.

Inspecting, Drying, and Storing the Sanitized Handle Properly

After sanitizing a HydraFacial handle, inspection determines whether it is ready for reuse. Sanitized is not sterile. Work under bright, neutral light. Check the nozzle, seams, tubing connection, and grip for residue, cloudiness, cracks, or trapped moisture. The FDA’s 2015 reprocessing guidance stresses validated cleaning before disinfection. For aesthetic equipment, follow the device instructions and disinfectant label. Do not improvise concentration or contact time. A handle may look clean while soil remains inside a joint.

After the required contact time, remove chemical residue only when instructions allow it. Wipe the handle with a clean, low-lint cloth. Place it in a ventilated, protected area. Keep ports facing downward when appropriate, without bending the tubing. CDC disinfection guidance identifies drying as an important step for reducing contamination risk. Never seal a damp handle in a drawer. Moisture can create odor, residue, and hidden microbial growth. Rushed drying is common. It deserves more attention.

Store the handle only when it is fully dry and visibly intact. Use a clean, labeled container away from splash zones, dust, and untreated tools. Record the date, operator, product, concentration, and contact time. AAMI ST79 emphasizes documented processing controls for reusable devices, although salon procedures may differ. Inspect again before the next client. That pause matters. If cracks, discoloration, loose fittings, or persistent odor appear, remove the handle from service and seek qualified technical guidance.

FAQS

What should I prepare before disinfecting a facial treatment handle?

Wash your hands and wear disposable gloves and eye protection. Prepare lint-free wipes, a clean tray, waste container, timer, and approved disinfectant. Keep tools organized.

Should the handle be disconnected before cleaning?

Yes. Disconnect power according to the equipment instructions. Remove detachable tips, tubes, and visible residue. Never immerse the handle unless specifically permitted.

Why must visible residue be removed first?

Organic residue can reduce disinfectant effectiveness. Use a dampened, lint-free cloth on the grip, grooves, nozzle, and edges. Dried serum may hide in seams.

How should narrow grooves and connection points be cleaned?

Use a soft brush for narrow grooves. Wipe loosened debris with a fresh cloth. Inspect the underside and connections under bright light. Small areas are easy to miss.

How should disinfectant be applied safely?

Apply it to the wipe when required. Avoid spraying near buttons, openings, or electrical connections. Cover every external surface evenly without forcing liquid inside.

How long should the disinfectant remain wet?

Keep the surface visibly wet for the full label contact time. A quick wipe is not enough. It feels slow, but this step matters.

What mistakes commonly reduce cleaning quality?

Rushed staff may shorten contact time or reuse soiled cloths. Cleaning only the front surface is another common mistake. That shortcut needs review.

What should happen after disinfection?

Let the handle and removable parts dry completely before reassembly. Check for cracks, cloudiness, loose fittings, or damaged seals. Stop using damaged equipment and report it.

What records should be kept?

Record the disinfectant, concentration, start time, cleaning time, and operator initials. These details can reveal repeated gaps. Records are useful, though not perfect.

Conclusion

Proper hygiene for facial treatment handles is essential for protecting clients and maintaining reliable equipment performance. This guide explains how to sanitize hydra facial handles between clients by following a consistent, careful routine. Begin by reviewing the handle’s care instructions, preparing appropriate protective equipment and approved disinfecting supplies, and separating clean items from used ones. Before disinfection, remove visible residue with a suitable cleaning solution, paying close attention to openings, edges, and contact surfaces.

After cleaning, apply the disinfectant according to its required concentration and contact time, ensuring every surface remains fully covered. Do not rush the process or reuse disposable materials. Once sanitation is complete, inspect the handle for remaining residue or damage, rinse only when the instructions require it, and allow it to dry completely in a clean area. Store the sanitized handle in a protected, dry location so it remains ready for safe use with the next client.

Isabella

Isabella

Isabella is a dedicated marketing professional with a sharp focus on driving brand growth and engagement through strategic content creation. With an extensive background in digital marketing, she combines her passion for storytelling with her keen understanding of industry trends to deliver......